Program an Uno with Raspberry Pi
Written By: Cherie Tan
Difficulty
Easy
Steps
6
The Raspberry Pi and Arduino are both popular boards, but each are better suited for different things. That said, why not combine the two?
In this guide, you will learn to connect an Arduino UNO to the Raspberry Pi and program it from an Arduino IDE within Raspbian. A Raspberry Pi 3 Model B+ is used here but the instructions are the same for any other board. We will build a circuit using a breadboard, and write a sketch on the Arduino IDE that will have LEDs lighting up.
Once you've mastered the basics, you are one step closer to working on more advanced projects that requires the use of both boards. These could include a smart home, or smart jukebox among many other projects.
sudo apt-get update && sudo apt-get upgrade

sudo apt-get install arduino
First, we will need to install the Arduino IDE (integrated development environment) on Raspbian. To do so, open the terminal and type the following.
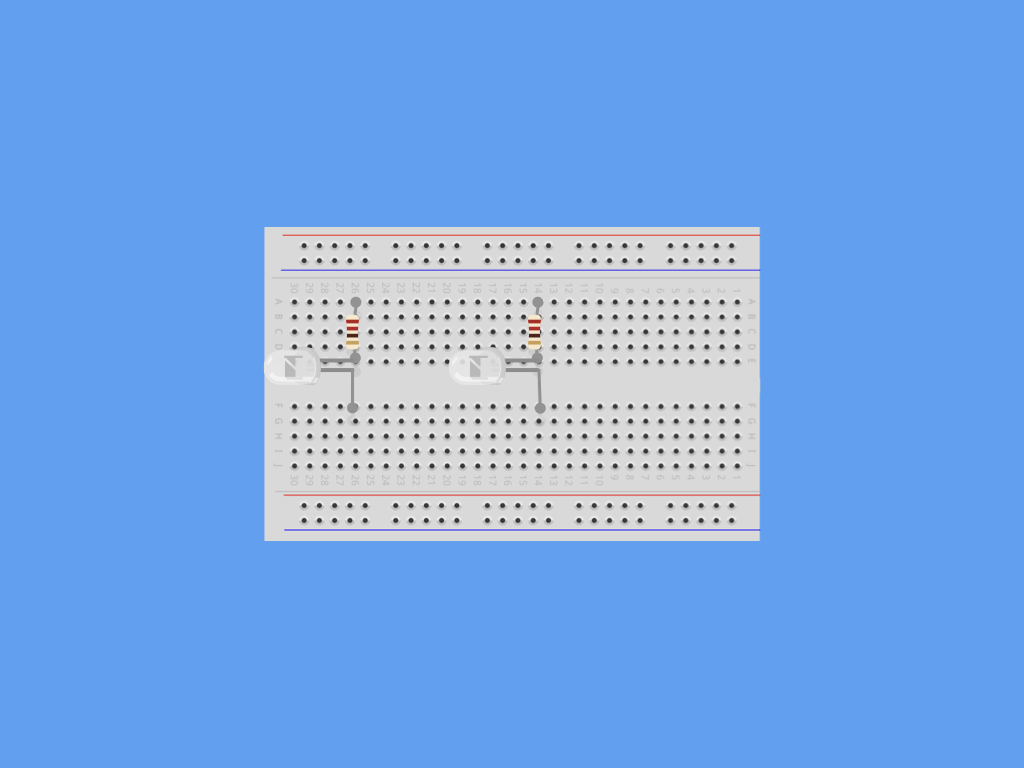
In the circuit we will be working on, a PIR sensor, two resistors and two LEDs will be used in conjunction with an Arduino Uno.
Move a hand over the PIR sensor, the LEDs will light up.
Connect an LED with a resistor, do the same for the second LED as shown.
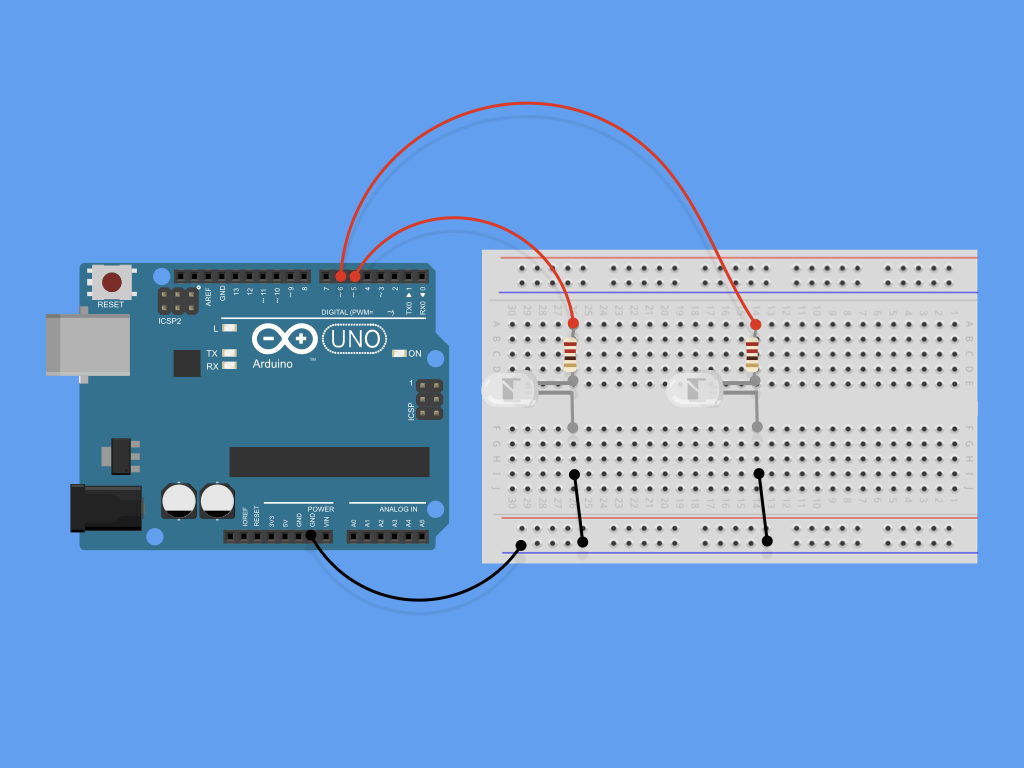
Connect one side of the LED to the ground rail, and the other to pins 5 and 6 on the Arduino Uno.
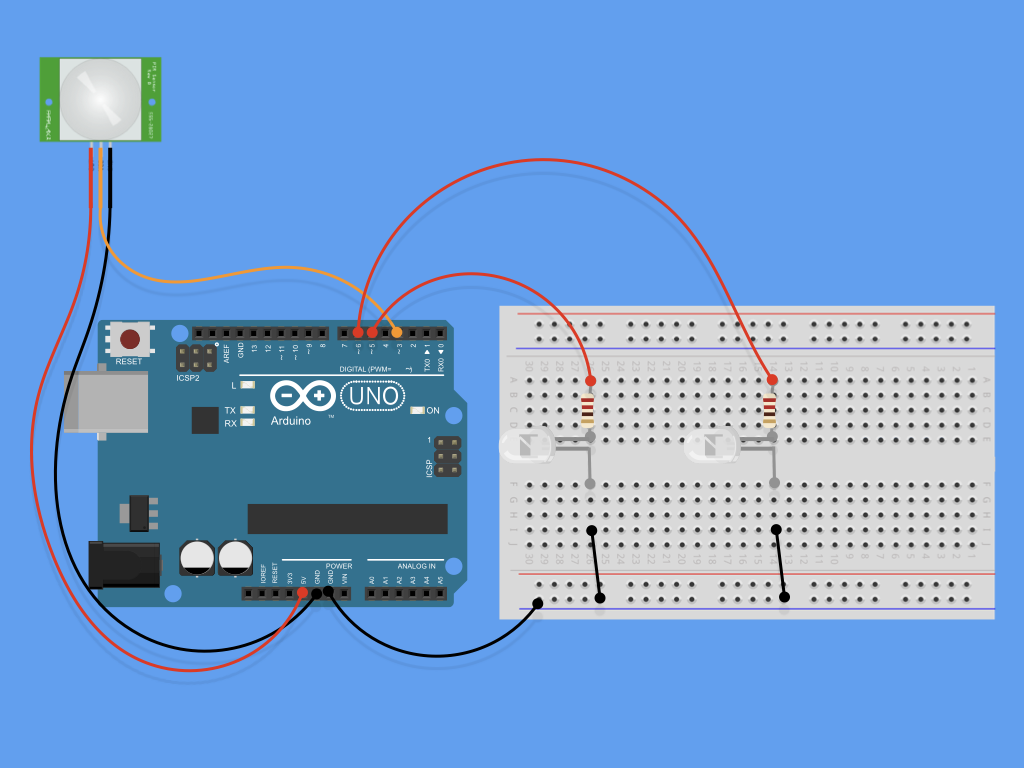
Connect the 3-pin connection of the PIR sensor. First, connect a red cable to 5V.
Connect a black cable to ground (GND)
Connect an Orange cable for the signal out at pin ~3
Once the circuit has been connected, attach the Arduino to one of the Pi's USB ports. This will supply the power as well as data connection from the Raspberry Pi to the Arduino Uno.
/*
 * Blinks two LEDs when motion detected
 */

//variables
int led1 = 5;
int led2 = 6;
int motion = 3;
int wait = 500; //500ms = 1/2s

void setup() {
  // put your setup code here, to run once:
  pinMode(led1, OUTPUT);
  pinMode(led2, OUTPUT);
  pinMode(motion,INPUT);
}

void loop() {
  // put your main code here, to run repeatedly:
  if (digitalRead(motion) == HIGH){
    digitalWrite(led1,HIGH);
    digitalWrite(led2,HIGH);
    delay(wait);
    digitalWrite(led1,LOW);
    digitalWrite(led2,LOW);
    delay(wait);
    }
}
We will be creating a ‘sketch’ on the Arduino IDE. “Sketches” are Arduino programs that are based on the C programming language. So open up the IDE and click on File > Examples > 0.1 Basics > BareMinimum
There are two areas for your code. They are void setup() and void loop(). The code in void setup() will run once at the start of the sketch while the code in void loop() will run endlessly in a loop.
Enter the following code in void setup() and void loop()
Save the file as PIRBlink.ino by clicking on File > Save
Let's look at void setup() a little closer. The function, pinMode tells the Arduino that the LEDs are connected to pin 5 and pin 6. It also tells the Arduino that they are to be treated as an output. Additionally, take note that variable int motion = 3. This tells the Arduino that the PIR sensor is connected to pin 3.
Now let us take a closer look at void loop(). Over here, using digitalWrite, we instruct the Arduino to raise the voltage to HIGH (5V), which lights up the LED. Then it will pause for half a second before turning off both LEDs.
It is good practice to use variables for the LEDs here; if the GPIO pins need to be changed, there will be fewer edits required.
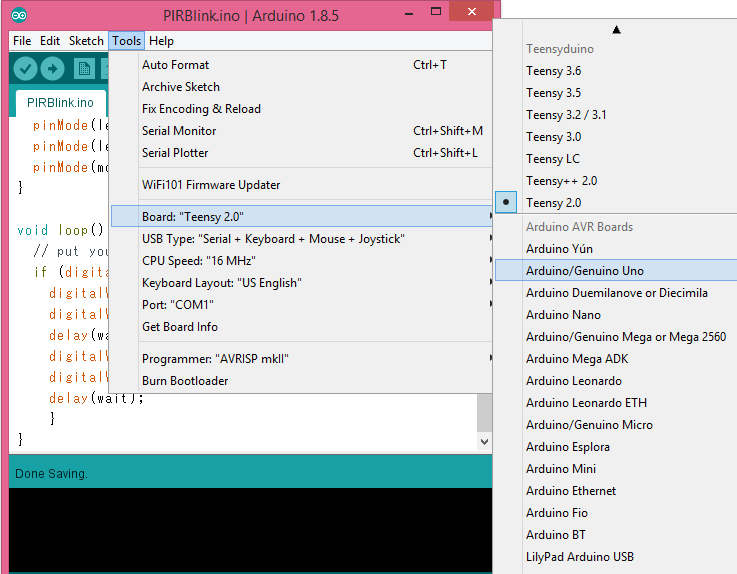
Finally, just before uploading the sketch, ensure that the correct board is chosen under Tools > Board.
Next, select Tools > Serial Port and make sure /dev/ttyACM0 is chosen. If you are using version 1.8.3 or above of the Arduino IDE, select the version '(Arduino/Genuino Uno)'.
Now, you're ready to upload the sketch! Click on the Upload button.
If successful, you should see the LEDs flashing when you move your hand over the sensor!