OLED Display Module with Arduino
Written By: Marcus Schappi

Difficulty
Easy
Steps
7
In this guide, we will use a 0.96'' OLED display screen with the Arduino. We will be using an SSD1306 OLED library and the Arduino IDE to program the Arduino.
After completing this guide, you are one step closer to using the OLED display in your own Arduino projects.
After completing this guide, you are one step closer to using the OLED display in your own Arduino projects.
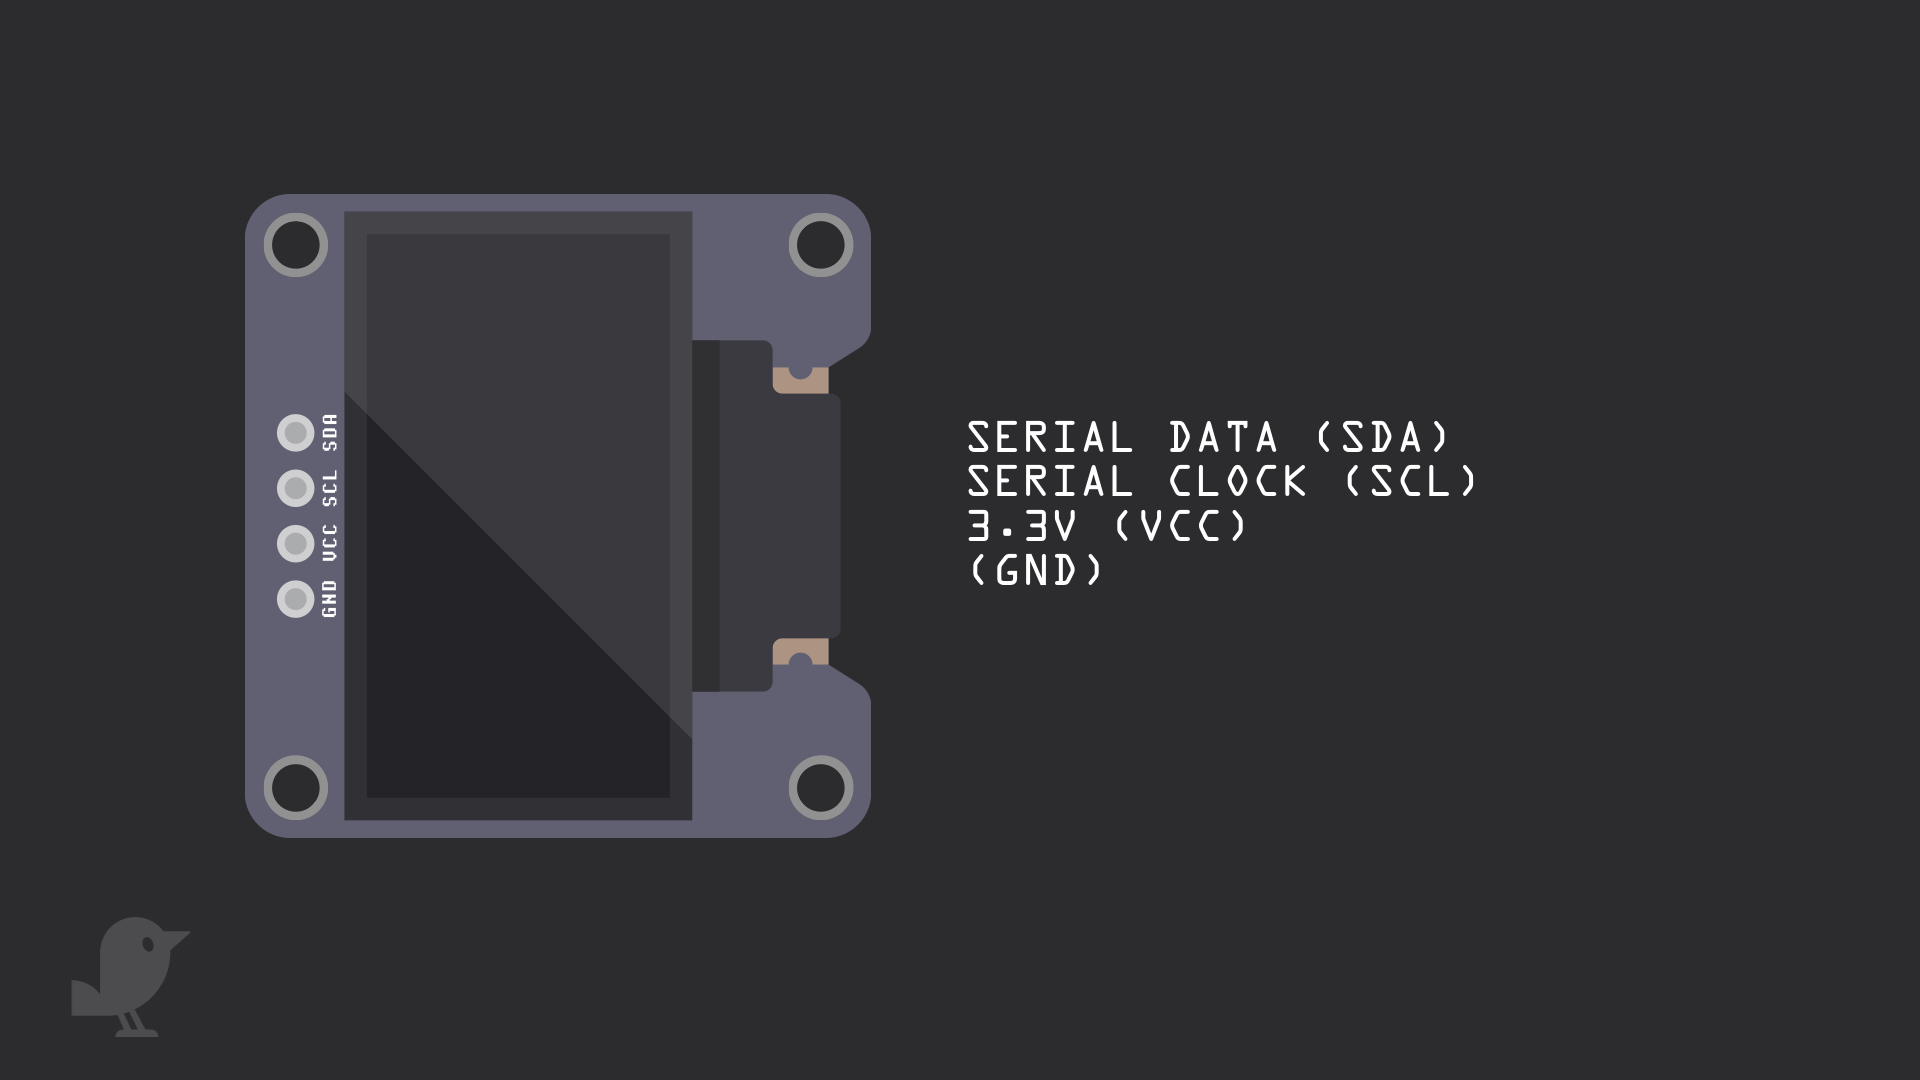
Let's take a closer look at the 0.96'' OLED module. It has four pins:
GND: In electronics, we define a point in a circuit to be a kind of zero volts or 0V reference point, on which to base all other voltage measurements. This point is called common ground or GND.
3.3V : While 'VCC' stands for Voltage Common Collector, we'll connect the VCC pin to 3.3V on the micro:bit
Serial Clock (SCL)
Serial Data (SDA) Voltage is the difference in electric potential between two points. As it is difficult to talk about voltage without a reference point, we need another point to compare it to. To connect the SCL and SDA pins to the Arduino, they must be connected to Pins A4 (SDA) and A5 (SCL). This is because pins A4 and A5 on the Arduino are what we call the SDA and SCL pins. These pins are required for the I2C protocol. I2C stands for inter-integrated circuit protocol, and it allows for some devices such as the OLED display to communicate with other devices like the Arduino.
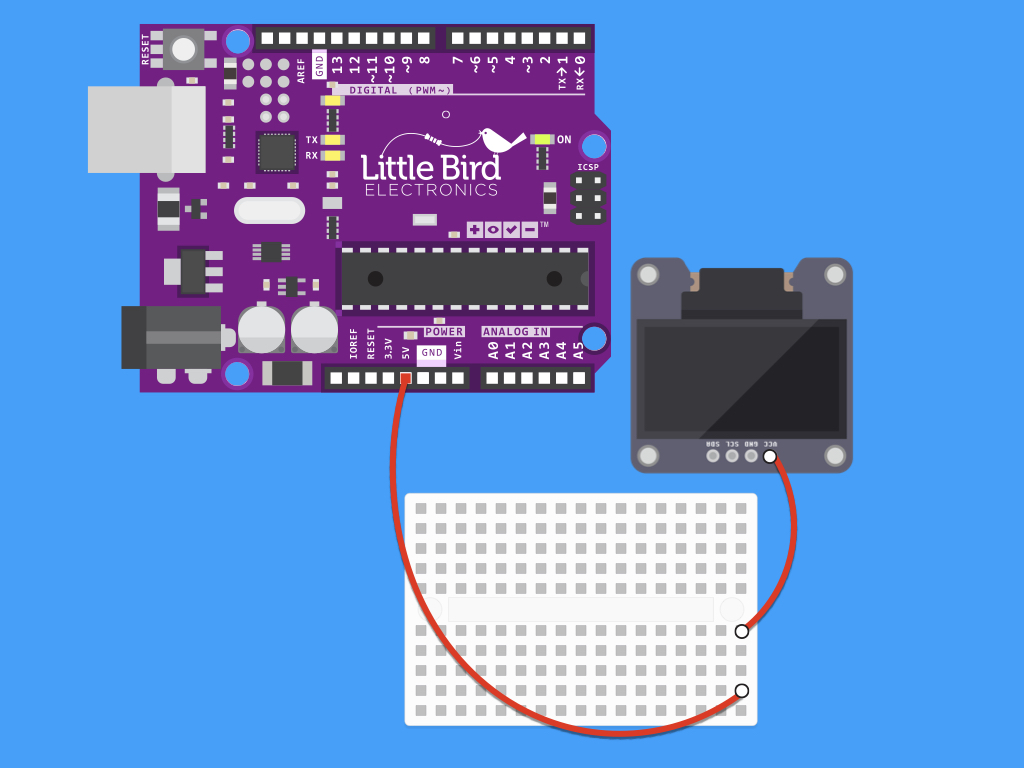
Connect a red jumper wire from VCC pin on the OLED module to 5V on the Arduino.


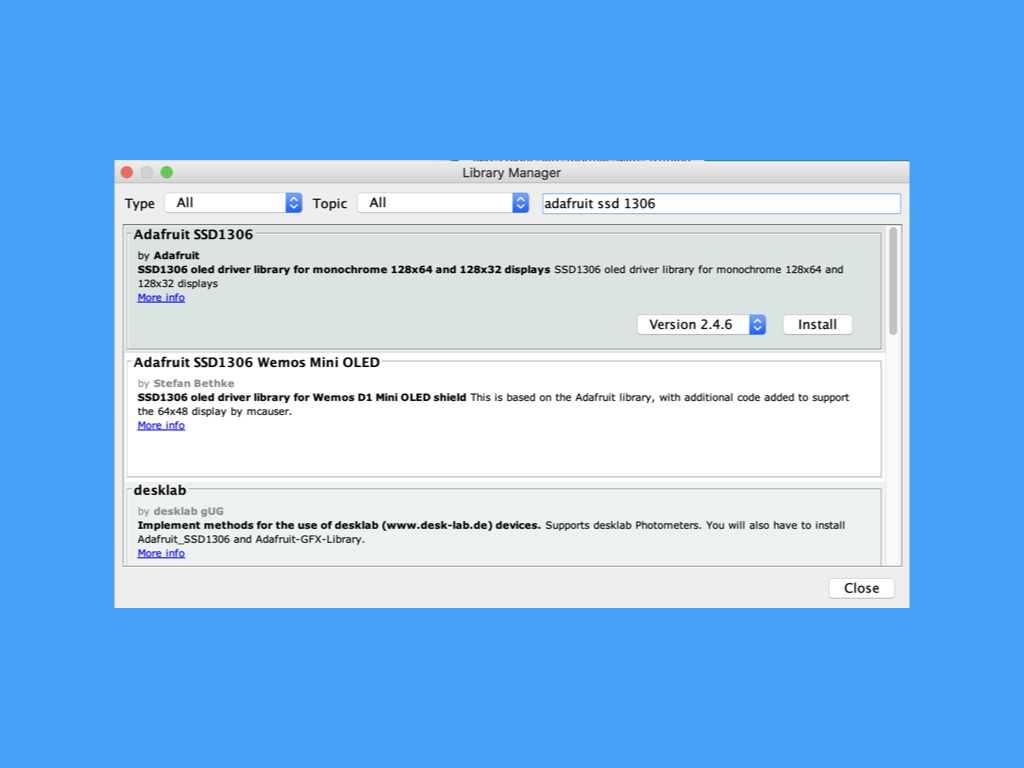
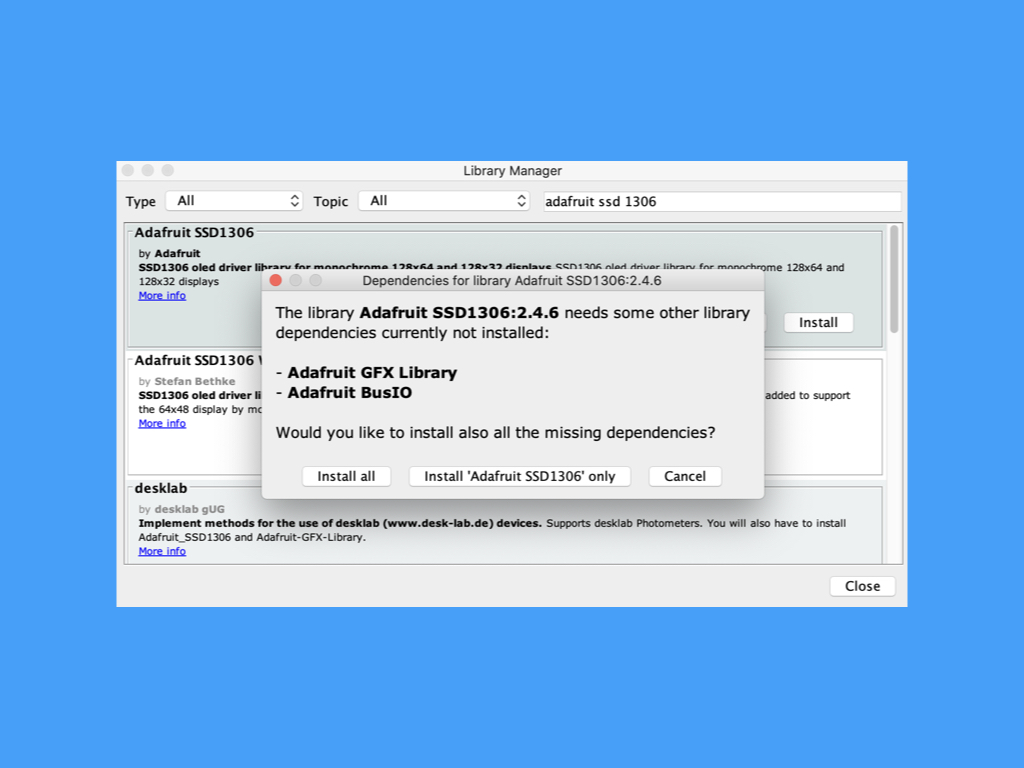
In the Arduino IDE, navigate to Tools > Manage Libraries Type 'adafruit ssdd 1306' in the search field. Find the library that says Adafruit SSD1306. Click on Install button next to it. You may be prompted to also install some dependencies, go ahead and install them all.

Make sure 'Arduino Uno' is chosen in Boards, and the right COM Port is selected. Navigate to File > Examples > Adafruit SSD1306 > ssd1306_128x32_i2c Upload the following code to the Arduino and watch the display change! Not sure which COM port to choose? If you are using Windows, open up the System window. Once the System window is up, open Device Manager. Look under Ports (COM & LPT). You should see an open port named "Arduino UNO (COMxx)". If there is no COM & LPT section, look under "Other Devices" for "Unknown Device".